
Why this screen
Half of a month's spending is known in advance: rent on the 1st, internet on the 5th, a subscription on the 11th, a paycheck twice a month. A scheduled payment is such a transaction, written down once, ahead of time.
Don't forget
The app reminds you of the due date with a notification — on the day of the payment or in advance, as you set it up.
Don't type it by hand
The due date has come — tap “Confirm”, and the transaction records itself: amount, payee, category, account.
See what's ahead
Upcoming payments are on “Overview” in the “What’s ahead” block and in the “Calendar”. You see what money is already promised to.
A scheduled payment isn't spending yet. Until you confirm it, account and envelope balances don't change: it only reminds and suggests.
What's where on the screen
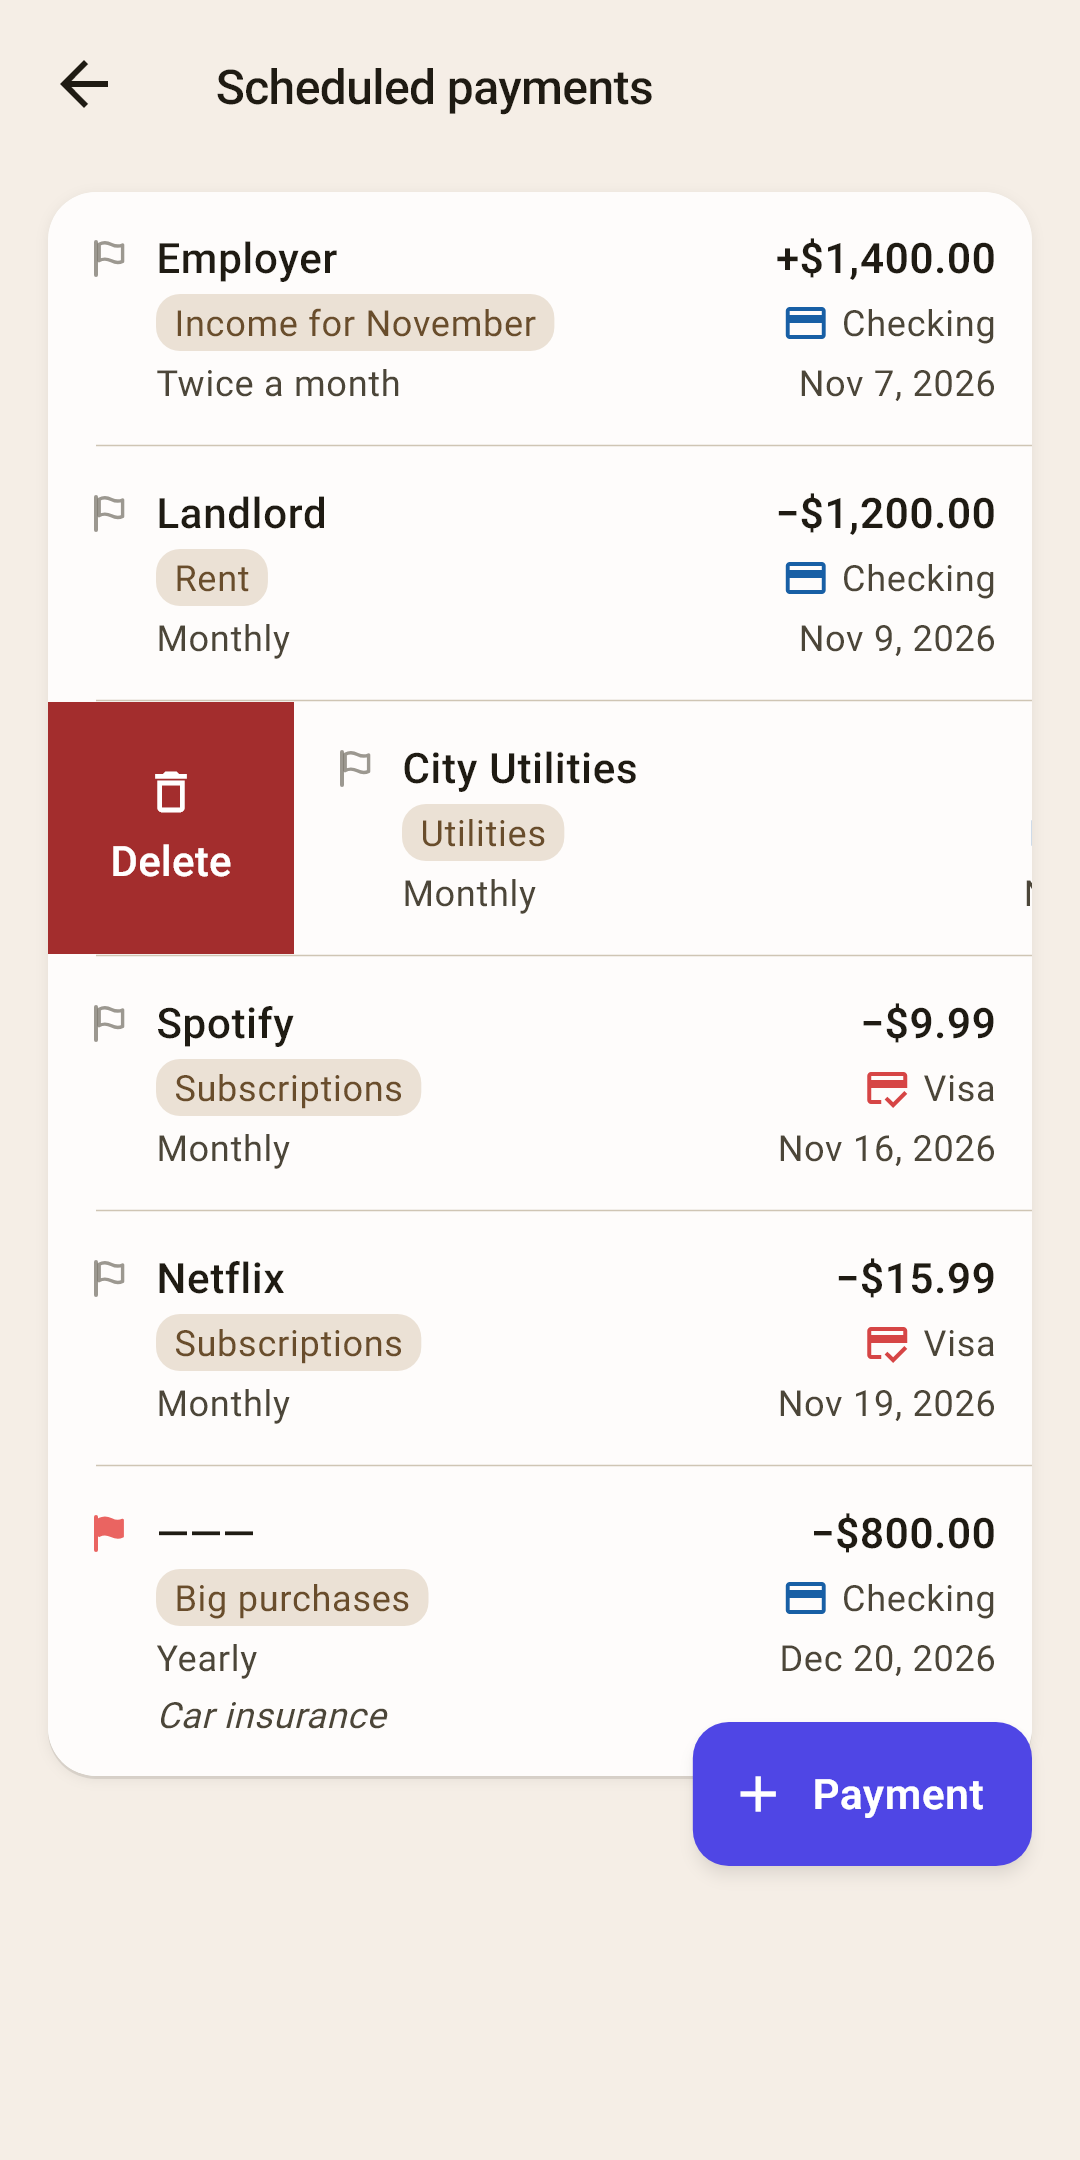
All scheduled payments in one list, the nearest due date at the top. Tap any screenshot to open it full screen.
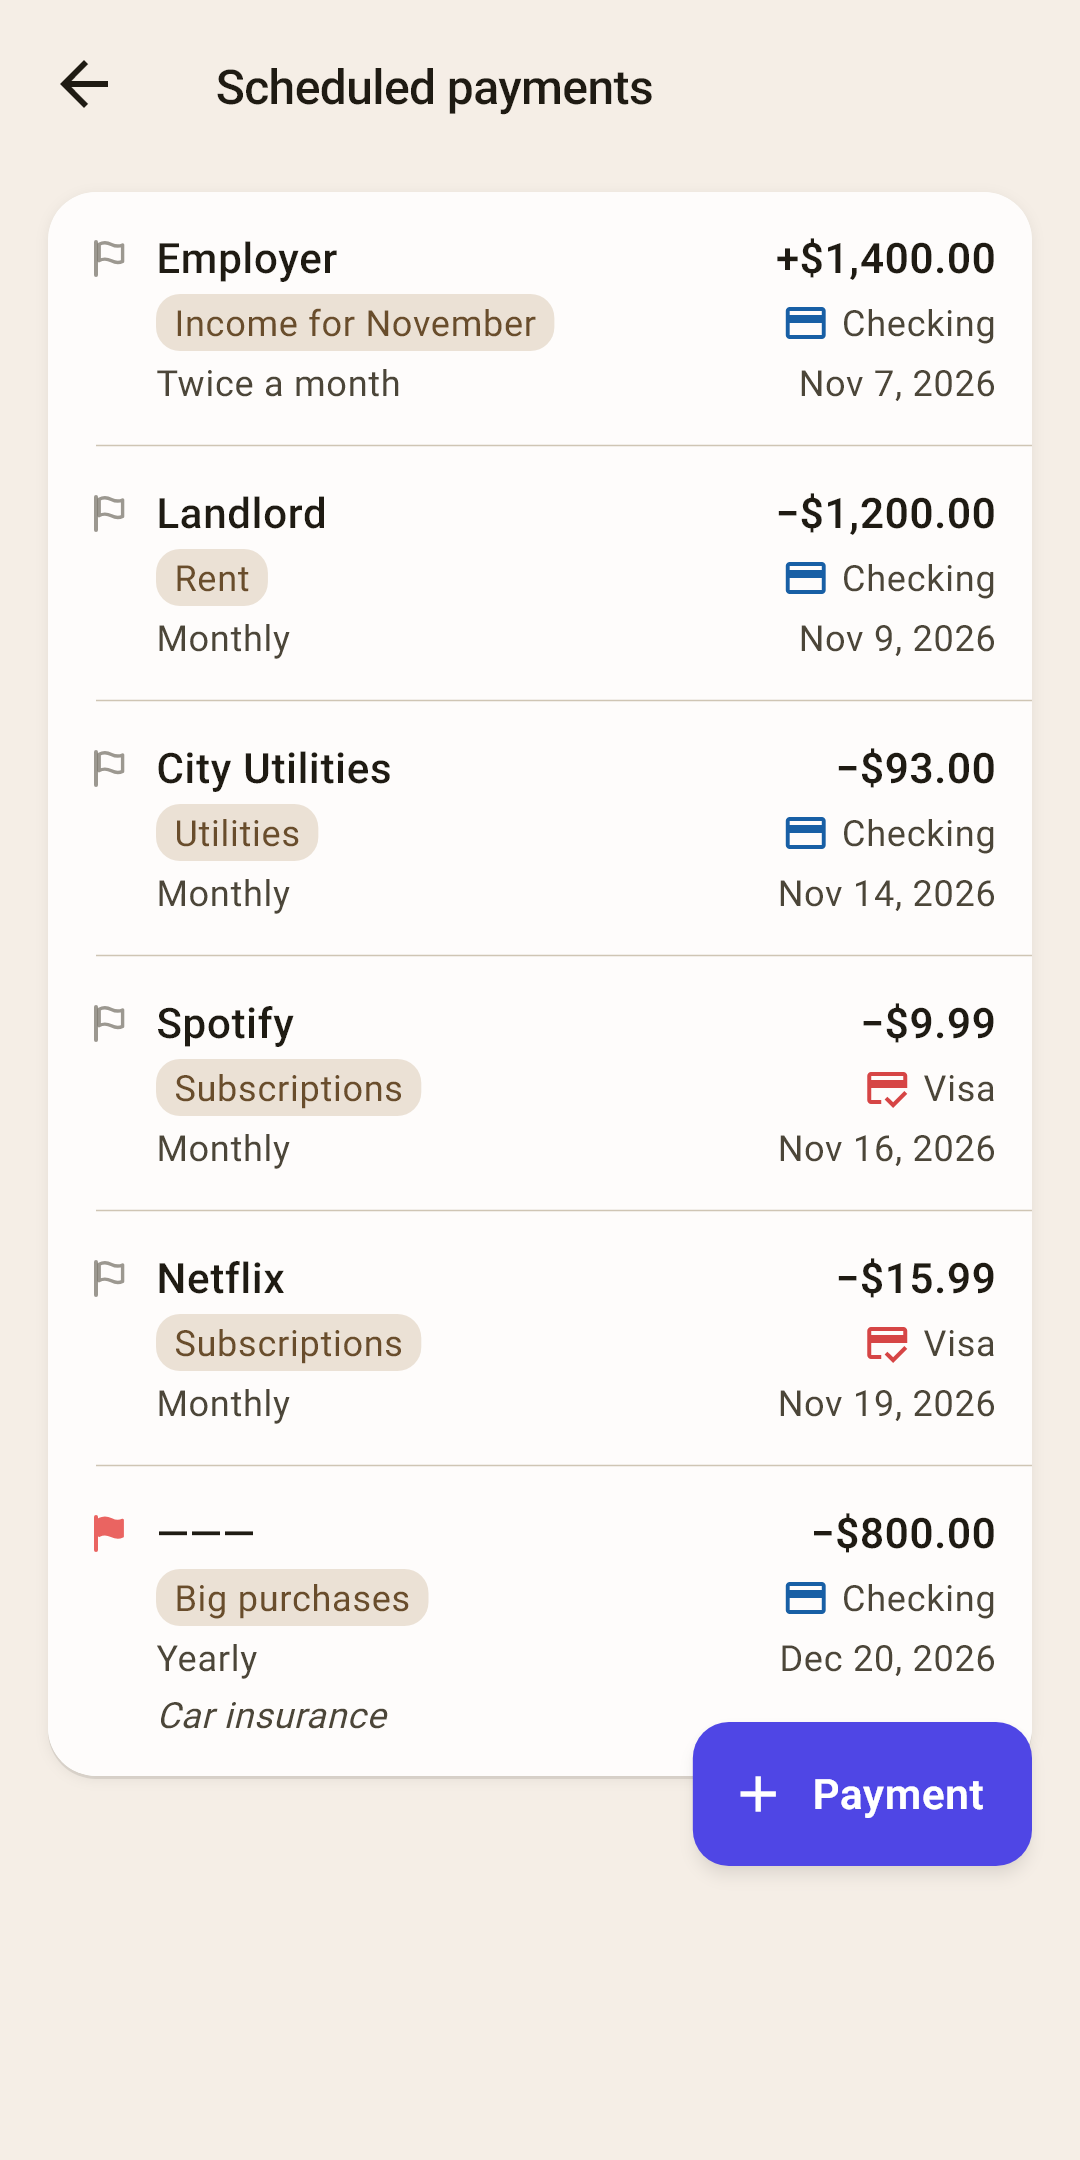
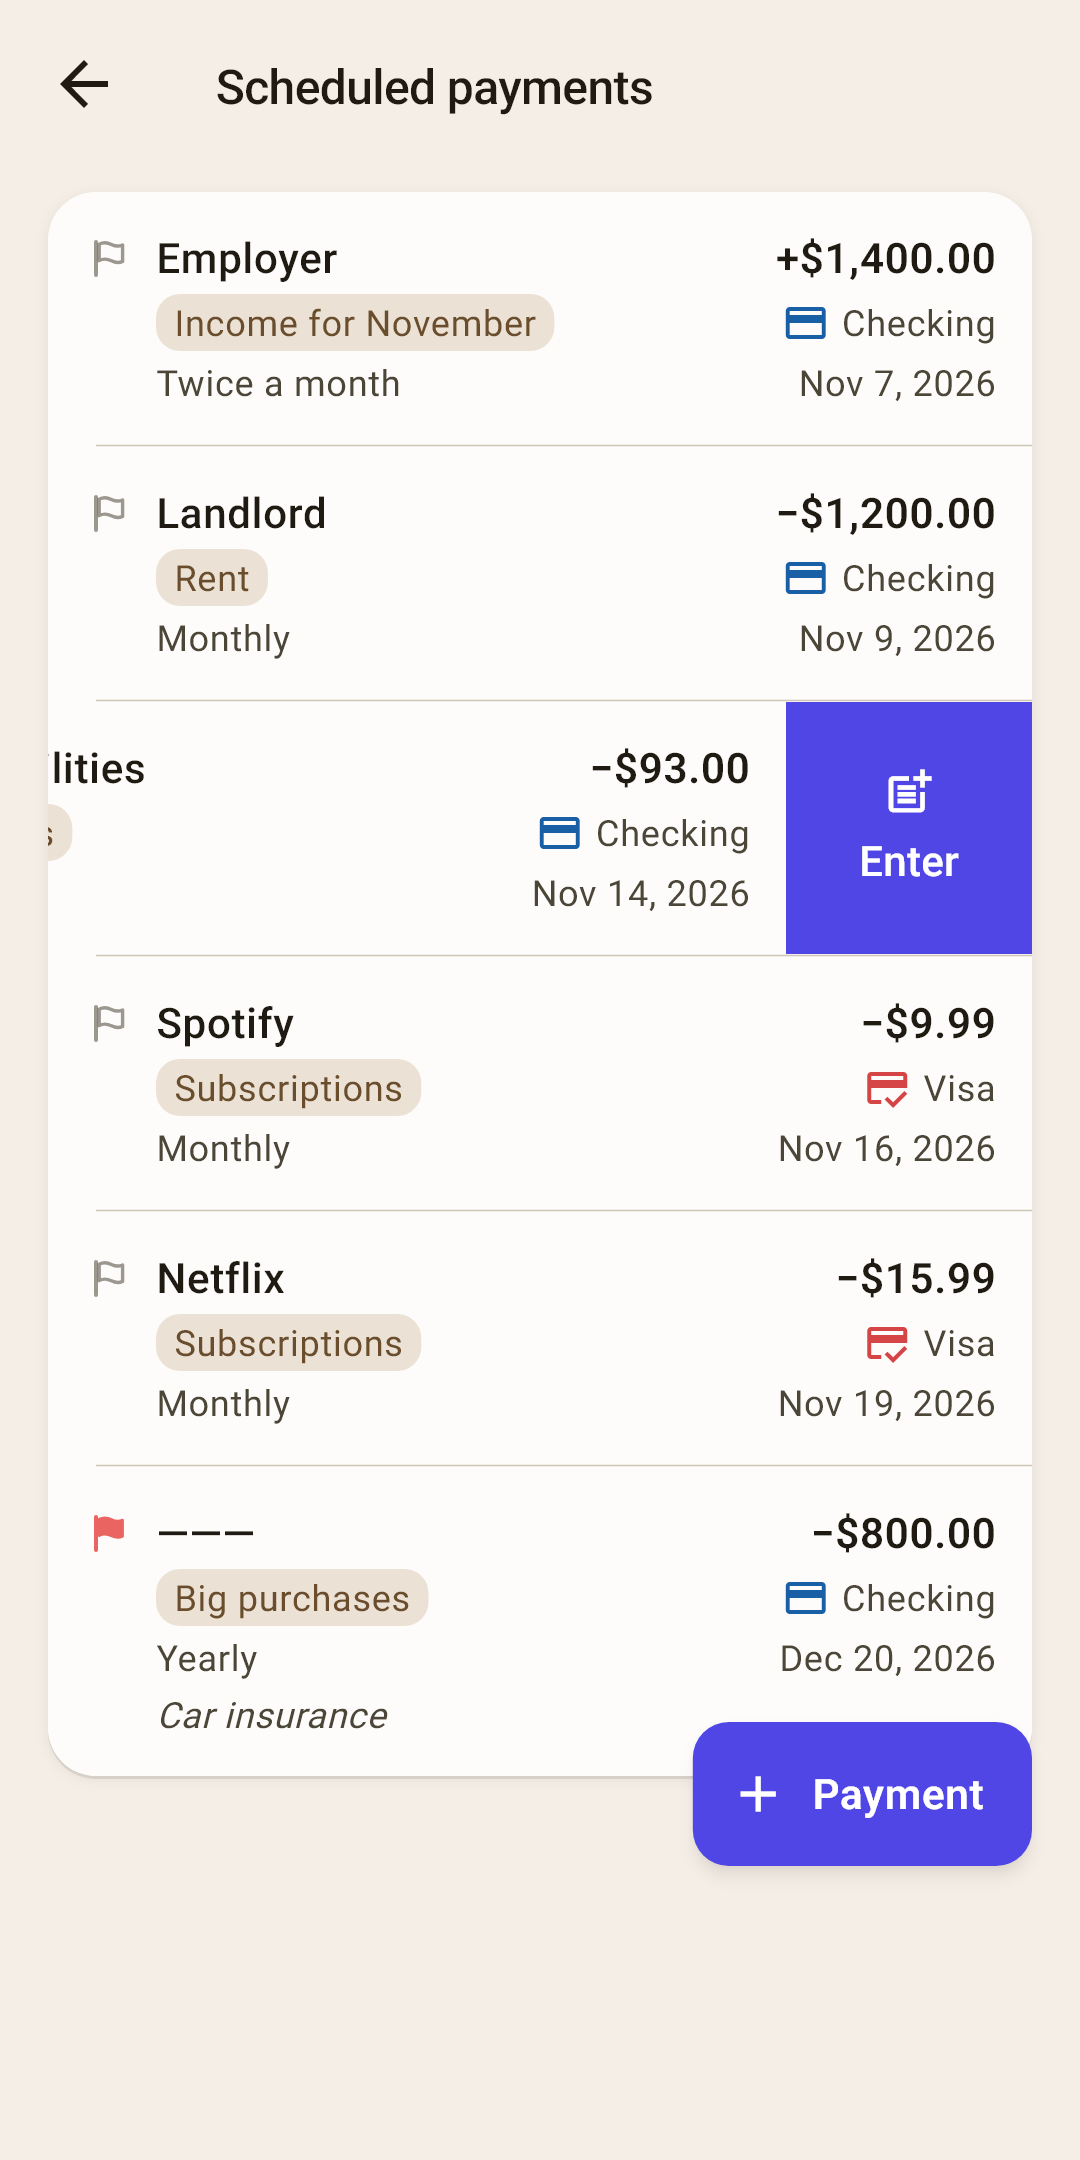
Row — one repeating payment. It's laid out like a transaction row: who and how much, category and account, how it repeats and when it's next due.
How it works
The first line is the payee and the signed amount: “−” means money will leave, “+” means it will arrive. The second is the category and account. The third is the frequency and the nearest due date.
A payment without a payee shows a dash “———” instead of a name, and the note sits on a fourth line — in the screenshot, “Car insurance”.
The list is sorted by the nearest due date. Payments whose due date has already passed are here too, at the top: they're waiting for confirmation — more on that below.
Frequency and date — on the left how it repeats, on the right the next due date. After each due date is entered or skipped, the date moves on to the next one by itself.
Flag — the same colored marker as on a transaction. When the payment is entered, the flag passes to the transaction.
“+ Payment” — a new scheduled payment. The steps are below.
While there are no scheduled payments, the screen is empty: “No scheduled payments” and the hint “Rent, subscriptions, salary — add one with the Payment button”.
A new scheduled payment
The form is the same as for a regular transaction, just with a “Repeat” field. Tapping a row in the list opens it too: then it's called “Scheduled payment” and edits the existing one.
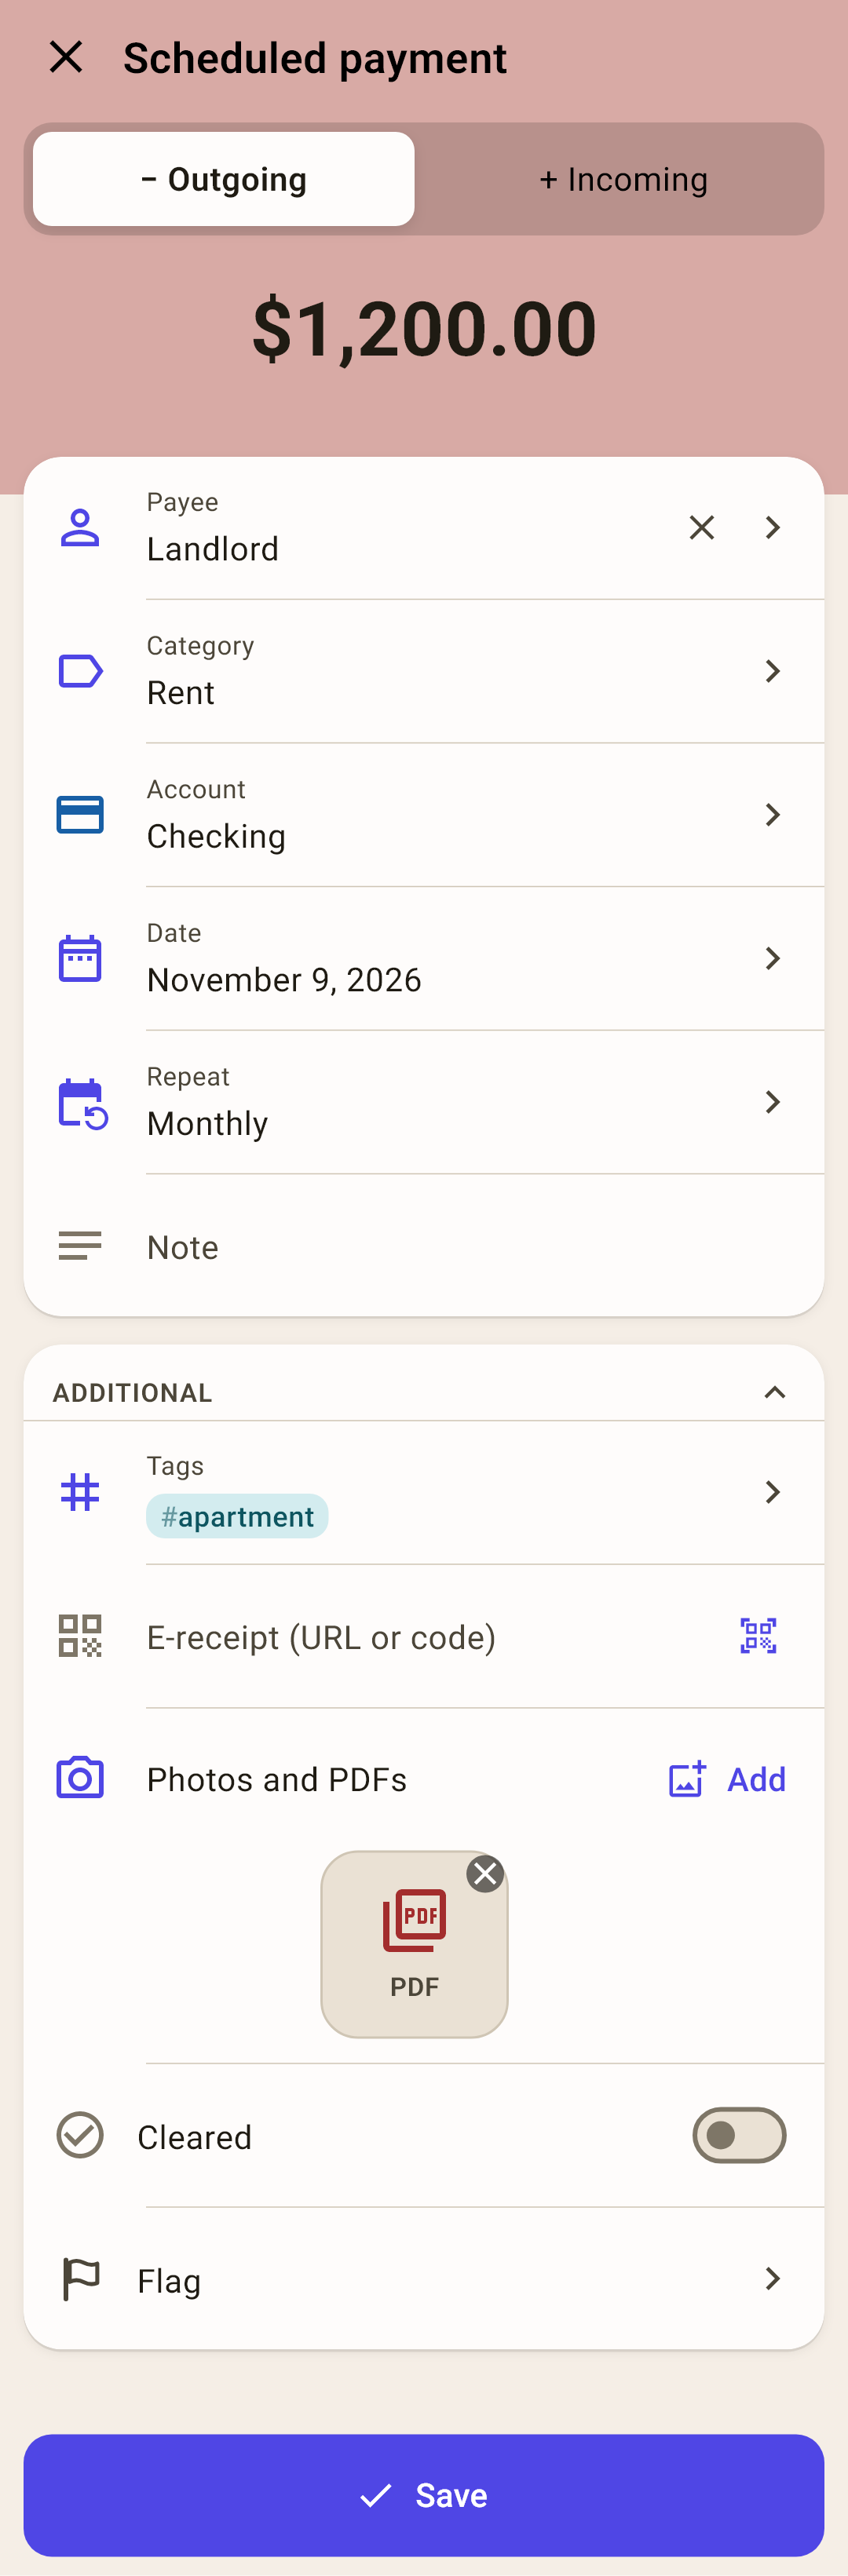
Amount — type it on the app's keypad and tap “Done”. Above the amount — “− Outgoing” for a payment and “+ Incoming” for a paycheck.
Payee — who you pay or who pays you.
Category — which envelope the money will leave. For a paycheck — the month's income.
Account — which account it's charged to or arrives in.
Date — the nearest due date. The app counts the next ones from it.
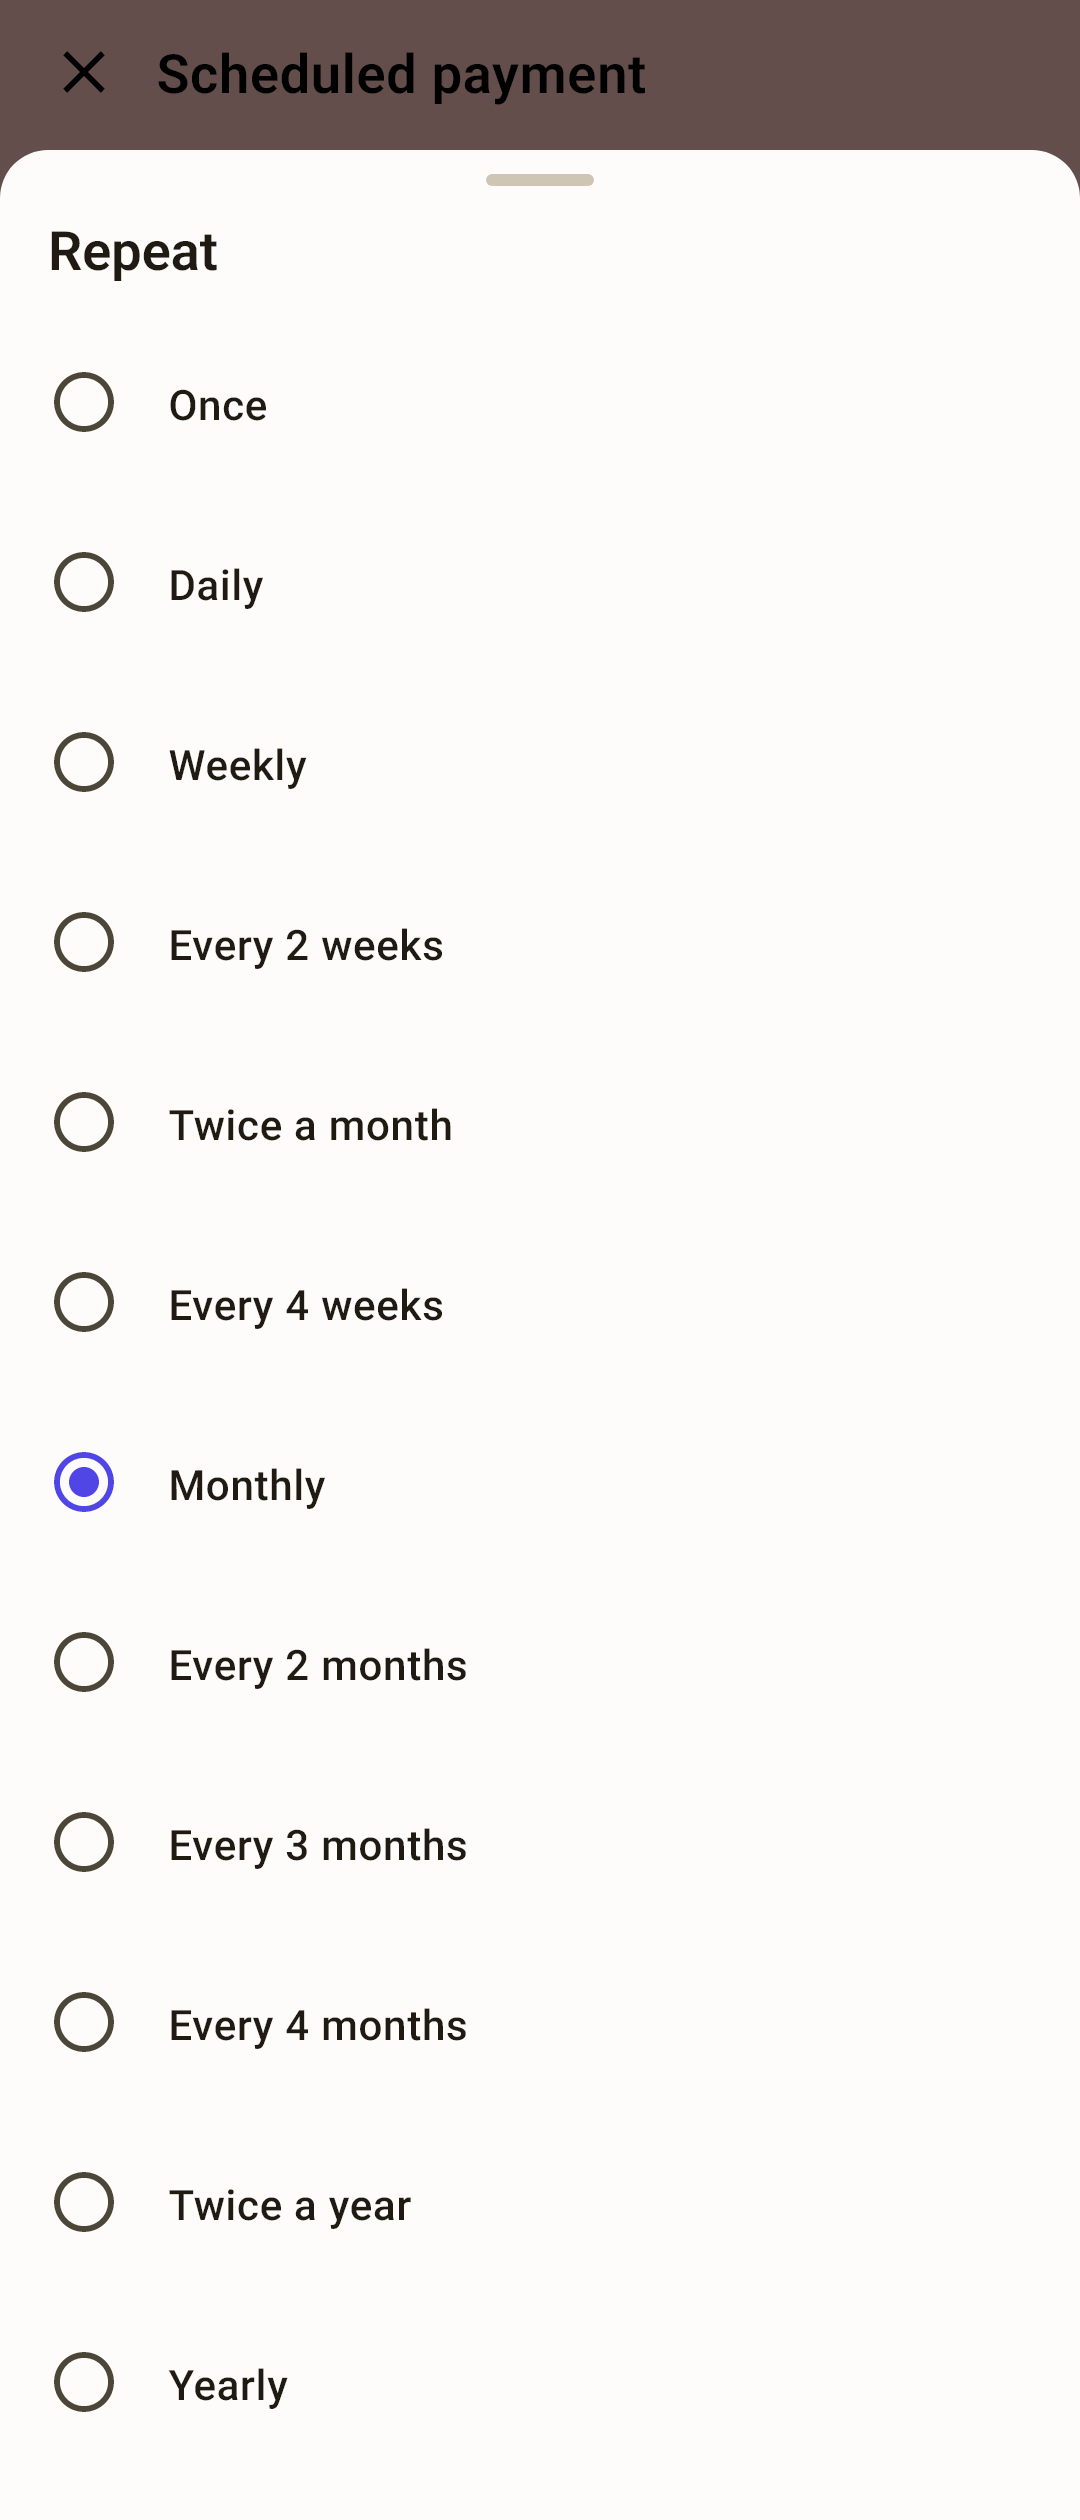
“Repeat” — how often: twelve options, the sheet is in the second screenshot.
How it works
“Once” — a payment without repeats. Once it's entered or skipped, it disappears from the list.
“Twice a month” — on the due day and 15 days after it: the 3rd and the 18th. If the second day doesn't exist in a month, the due date falls on the month's last day.
“Every 4 weeks” — not the same as “Monthly”: there are 13 due dates a year, not 12, and the date shifts each time.
“Monthly” and less often — on the same day of the month. If that day doesn't exist in a month, the due date falls on the last day of the month and comes back the next one: a payment on the 31st arrives on February 28, March 31, April 30.
Tags — the same labels as on transactions. In the screenshot, rent has the “apartment” tag.
“Additional” — e-receipt, photos and PDFs, “Cleared” and the flag. In the screenshot, a PDF of the lease is attached to the rent.
How it works
Everything you fill in here, along with the tags, goes into every transaction entered from this payment. Tags make sense here: every rent payment lands under the “apartment” tag by itself. An attachment, though, is usually needed once: it's enough to attach the lease to one transaction — when you enter the first payment, tap “Edit” and add the PDF in the form. Attached here, it would sit as an icon next to every payment for years to come. Fill in the receipt, photos and PDFs here only if every transaction really needs the document.
“Save” — the payment appears in the list. If reminders are on, the app will remind you about it.
How to create a payment
“Settings” → “Planning” → “Scheduled payments”.
Tap “+ Payment” at the bottom right. “New scheduled payment” opens.
Type the amount and tap “Done”.
Choose the payee, category and account.
“Date” — the nearest due date.
“Repeat” — how often it repeats.
Optionally — tags and “Additional”.
“Save”.
A scheduled transfer
A credit card payment, a loan installment, topping up a savings account — that's a transfer between your own accounts. In the “Payee” field, choose an account in the “Transfers” section, and the direction — “Outgoing” or “Incoming”, as with a regular transfer.
A transfer means two accounts
The payment shows on both accounts' screens, in the “What’s ahead” block: as a minus on checking, as a plus on the loan.
On the confirmation screen, in the reminder and in the weekly summary it's named by its route: “Checking → Loan”.
“Confirm” records the transfer on both accounts at once, as the form does.
Accounts in different currencies — “Credited” and “Rate” appear under the payee: enter the rate right away, when creating it. When the due date comes, “Confirm” opens the form with these numbers — check the day's rate and save.
A transfer to an off-budget account (a loan, a deposit) takes money out of an envelope — the app asks for a category, as with a regular transfer. A transfer between budget accounts (checking → credit card) doesn't need a category.
In the “Calendar” on “Overview”, a credit card payment isn't shaded as spending: the money stayed in the budget. A payment on an off-budget loan is shaded.
What a scheduled payment can't have
A split amount: when you save, the app says “Scheduled splits are not supported yet”.
From an existing transaction
The fastest way to create a scheduled payment is from a transaction you've already recorded: the form gets everything except the frequency.
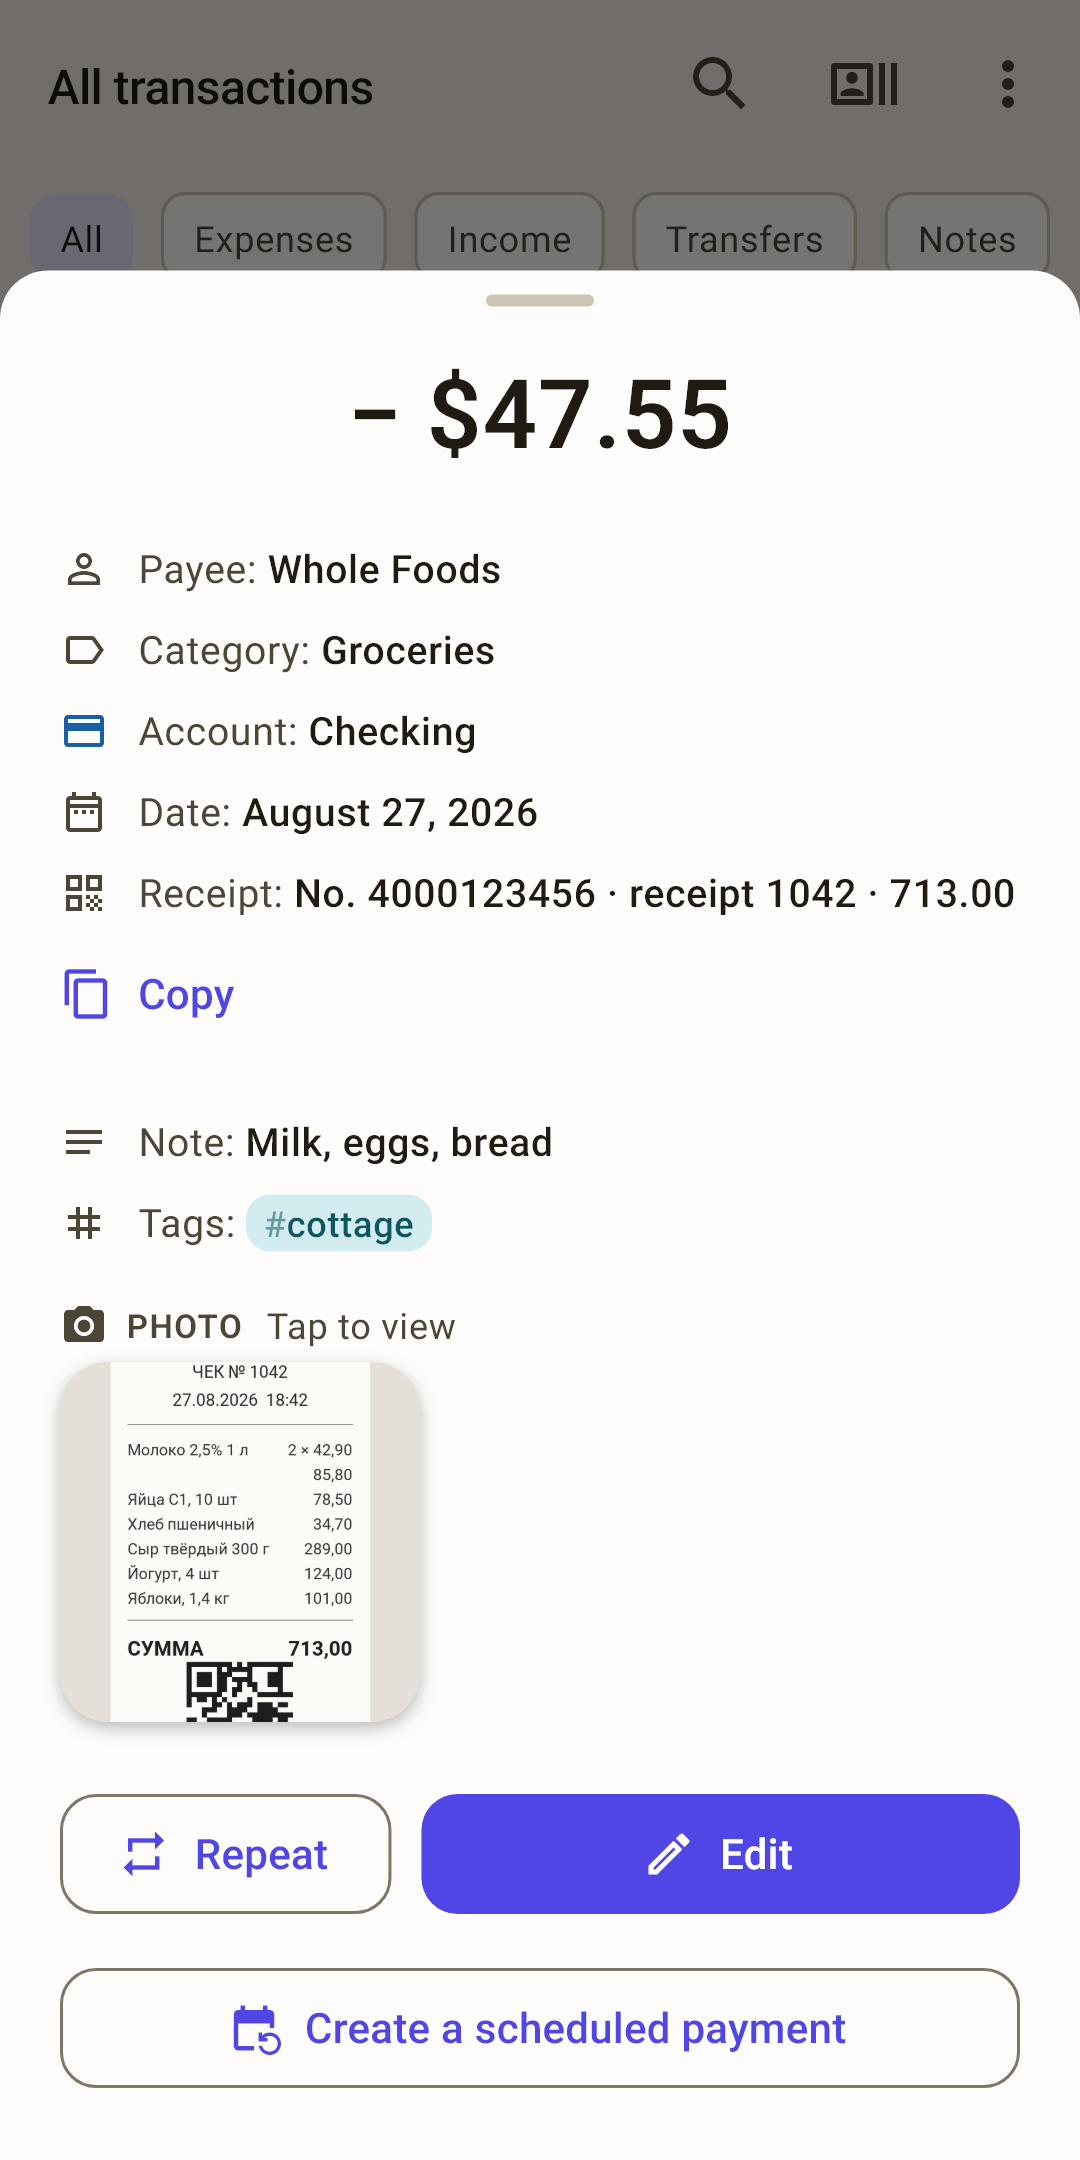
“Create a scheduled payment”
Tap a transaction in “Activity”, on an account or category screen — the transaction sheet opens.
At the bottom — “Create a scheduled payment”.
“New scheduled payment” opens with the same amount, payee, category, account, note, flag and tags. The e-receipt, photos and PDFs, and “Cleared” are empty: each payment has its own. Need to attach, say, a contract? Add it here. The “Repeat” sheet opens on top right away — choose the frequency.
The date fills in by itself — the nearest due date after that transaction, but not earlier than today: from a transaction on the 5th, a monthly payment starts on the 5th of next month.
“Save”.
Only a regular transaction has the button: a split amount and a transfer don't.
When it's due
On the due date the payment starts waiting for confirmation. It isn't entered by itself: rent might have been paid a day late, and utilities come with a different amount every month. You decide.
 Open the screenshot full size ↗
Payment card
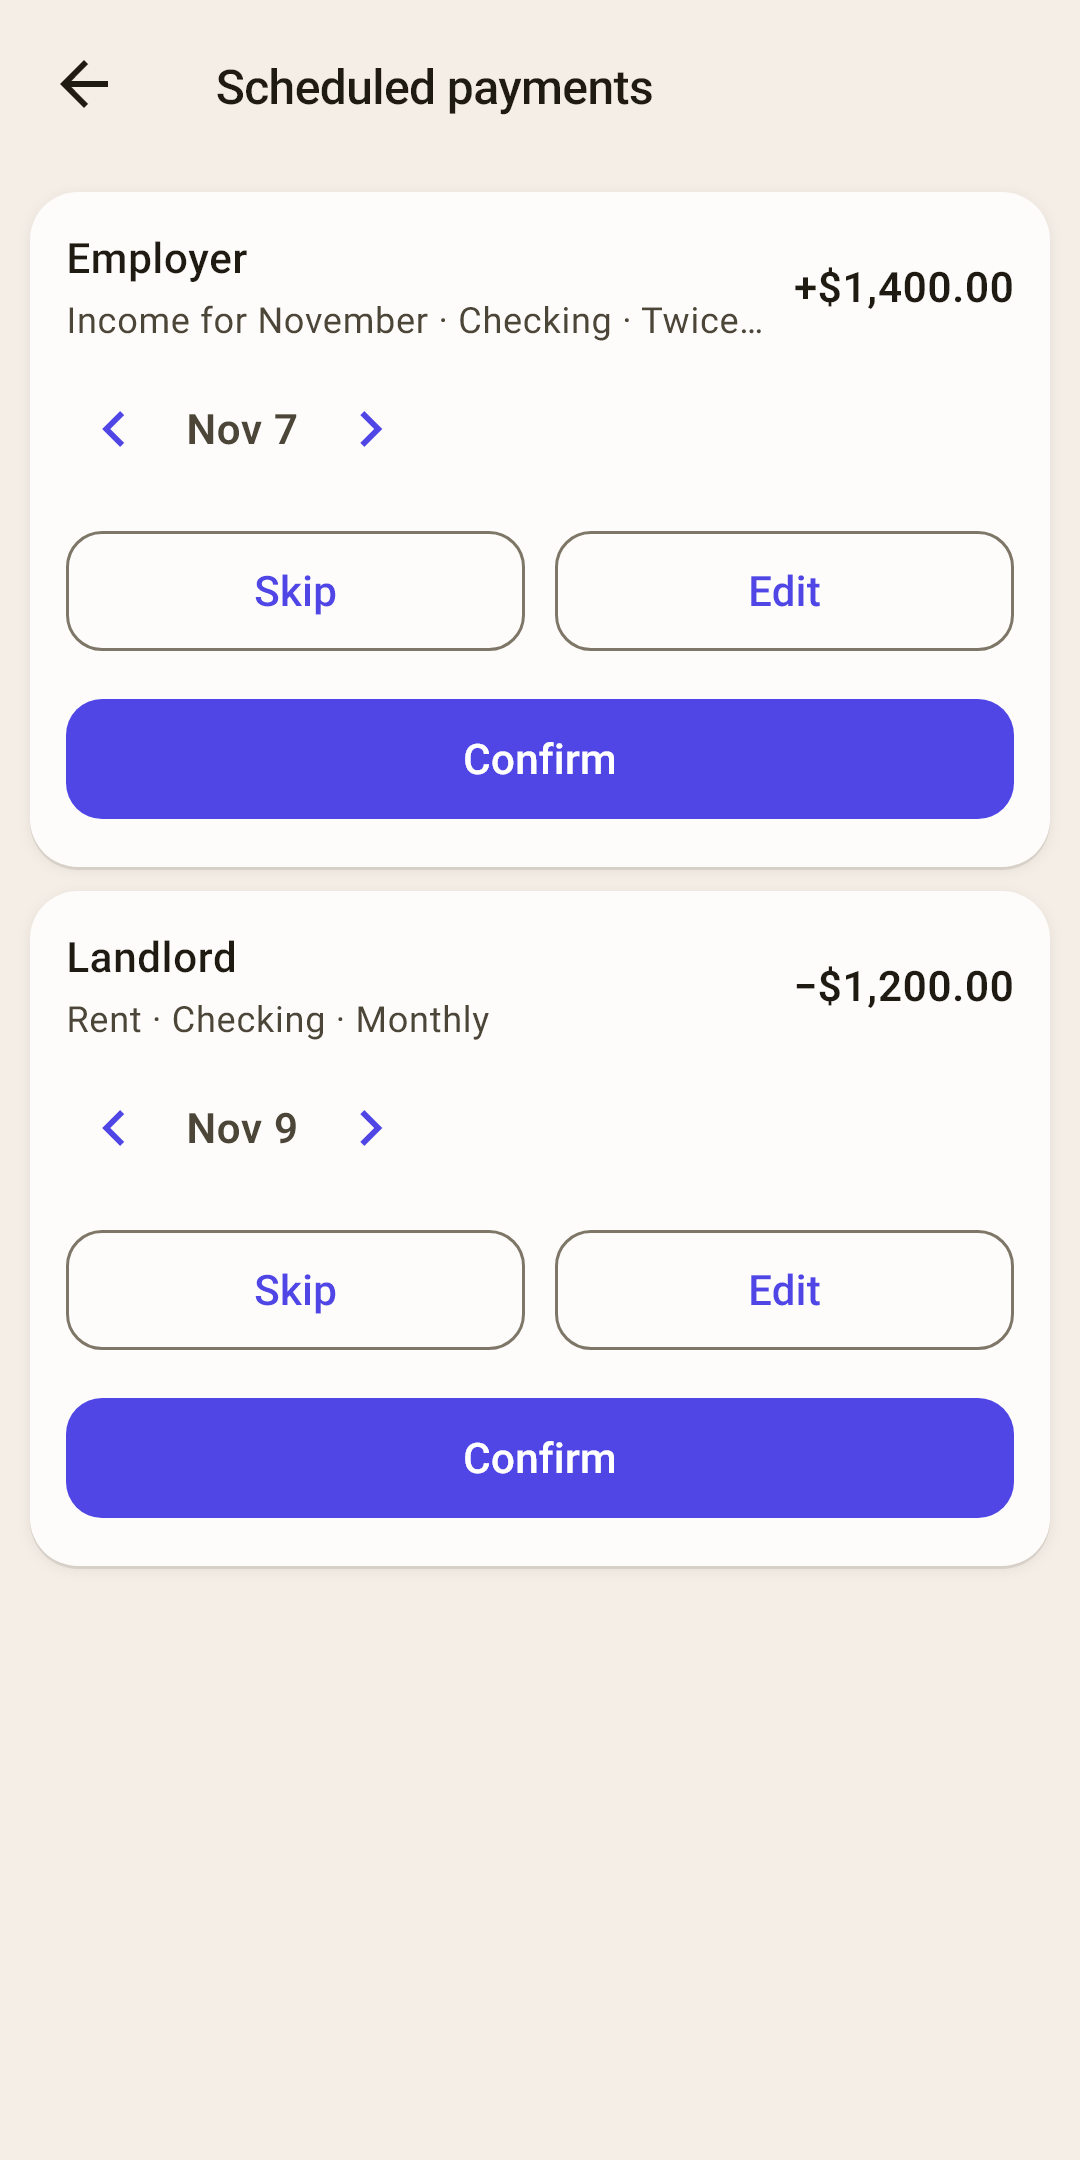
Who, how much, category, account and frequency. The oldest due date at the top.
Entry date
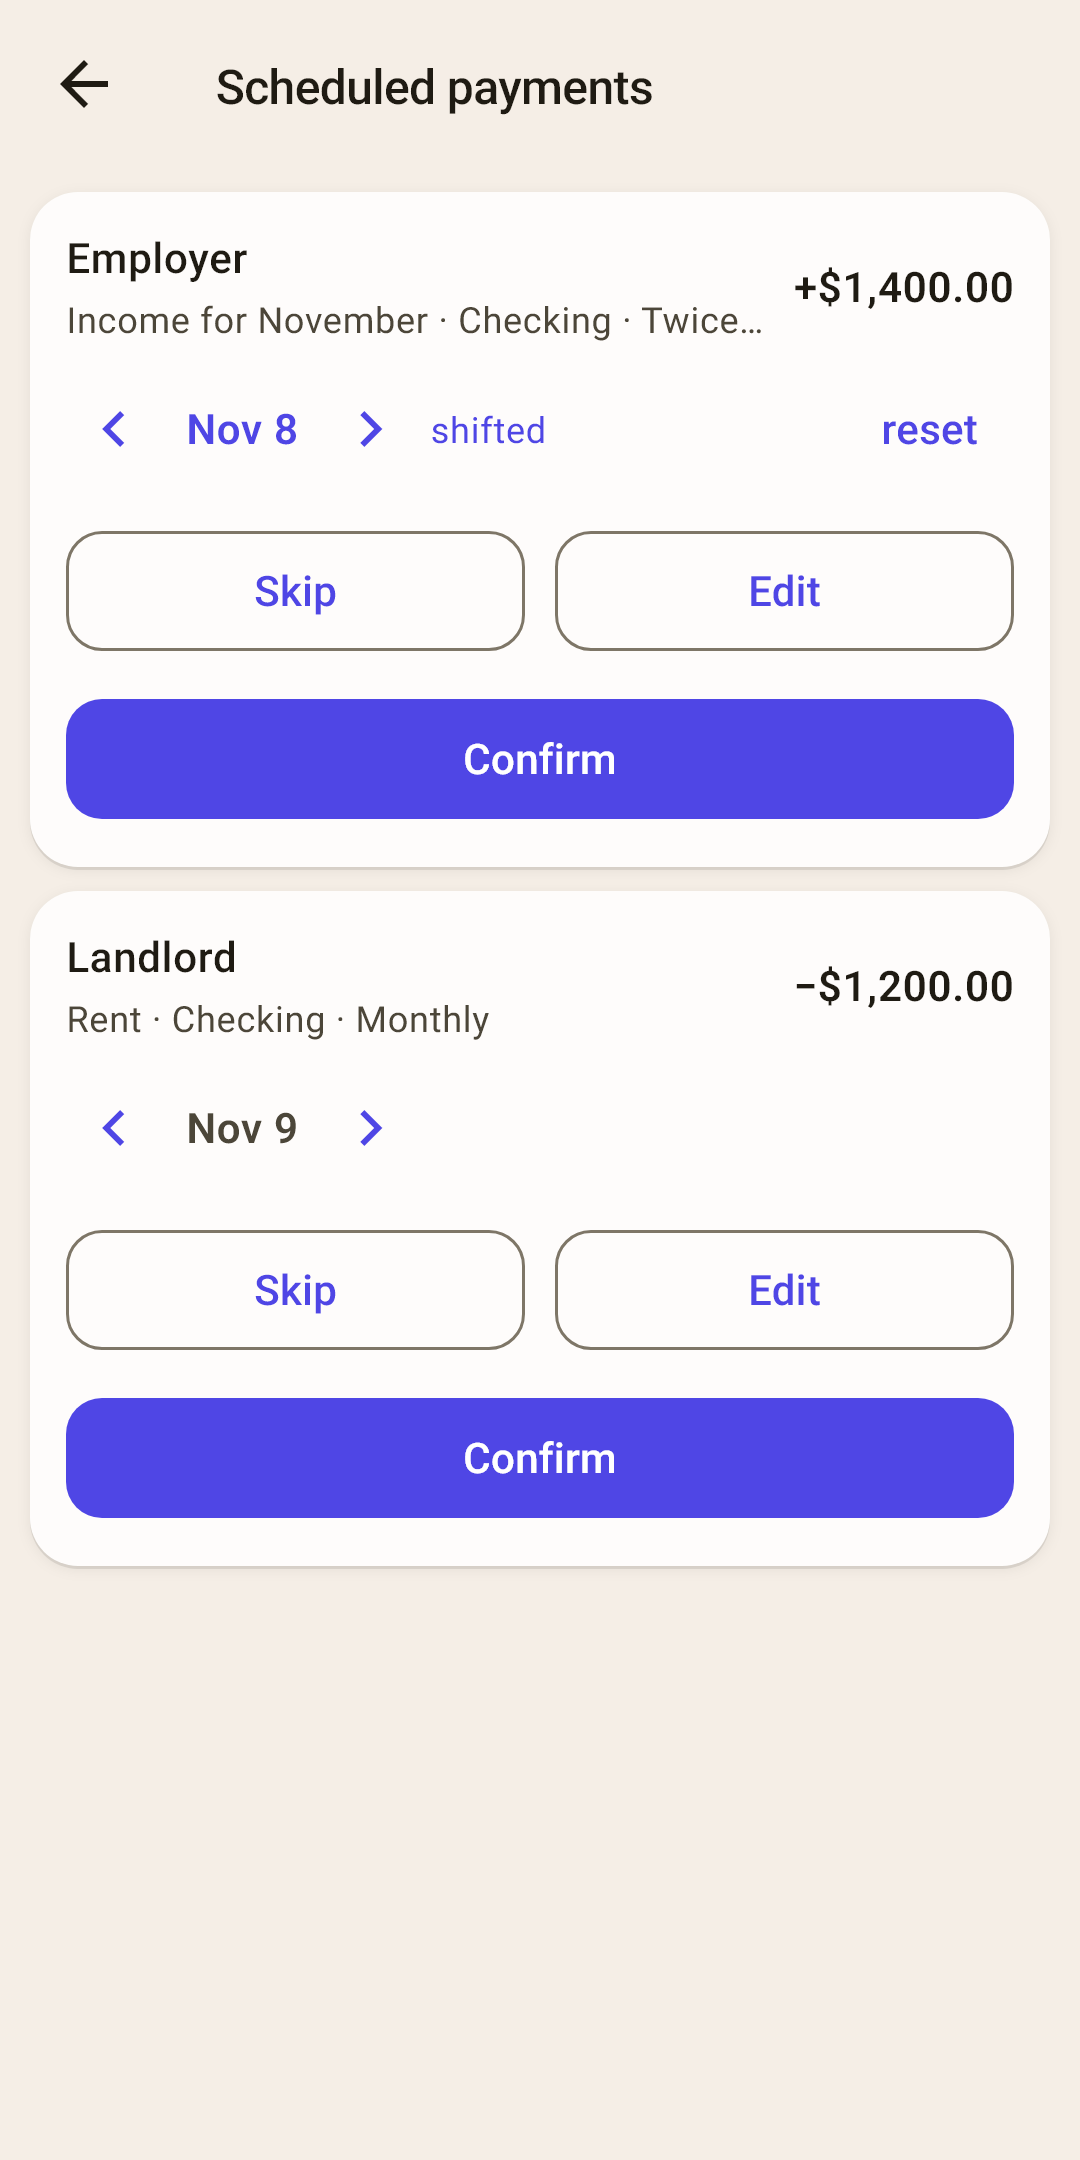
It starts as the due date. “‹ ›” move it a day earlier or later, and tapping the date opens a calendar — a month either way. Once moved, “shifted” and “reset” appear next to it (second screenshot); “reset” brings back the due date.
“Confirm”
The transaction is recorded on the chosen date and appears in “Activity” with everything the payment holds: tags, receipt, photos and PDFs, the “Cleared” mark. The card goes away, and the due date moves on to the next one.
How it works
The next due date is counted from the DUE date, not the entry date: rent due on the 1st was paid on the 3rd — the next due date is still the 1st. Otherwise the schedule would creep with every delay.
“Edit”
If the amount is different this time. The transaction form opens with the payment's fields — and with its tags, receipt, photos and PDFs: adjust and save — the transaction is recorded, and the due date is closed. Closed the form without saving? Nothing changed.
“Skip”
There was no payment this time. No transaction is recorded, and the due date moves on to the next one. A “Once” payment disappears after a skip.
If several due dates piled up
Didn't open the app for two months? A monthly payment has two due dates behind it. The card shows the oldest; confirm or skip it — the next one appears, until you reach today. When there's nothing left to sort out, the screen says “No payments to confirm”.
A scheduled transfer is entered as a transfer — on both accounts at once. If the accounts are in different currencies, “Confirm” opens the form with the “Credited” and “Rate” fields filled in when you created it — adjust to the day's rate and save.
Earlier or later than due
Money rarely arrives on the exact day. A payment is entered with the date it really happened — and the due date is closed: on its day it won't come up again, neither on the confirmation screen nor as a reminder.
The paycheck came 2 days early
The due date hasn't come yet, so it isn't on the confirmation screen.
“Settings” → “Planning” → “Scheduled payments”.
Swipe the “Employer” row left — “Enter” appears. Tap it.
The transaction form opens: amount, payee, category, account, tags — from the payment, date — today. Money didn't arrive today? Tap the “Date” field and pick the day.
“Save”.
The paycheck is recorded on the day it arrived. The due date is closed: on its day the app won't remind you or ask you to confirm. The next due date follows the schedule: twice a month — the next of the two days, monthly — a month after the due date, not after the day you recorded it.
Rent was paid a day late
The due date has already passed — the payment is waiting on the confirmation screen.
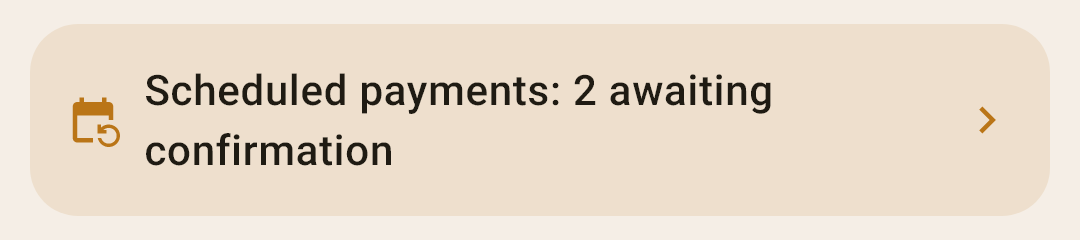
Tap the “Scheduled payments: … awaiting confirmation” banner on “Overview”.
In the payment card, tap “›” — the entry date moves a day later. Tap the date itself to open a calendar.
“Confirm”.
The transaction is recorded on the day you paid. The next due date stays on schedule — the 1st, not the 2nd.
The amount is different this time
Utilities are different every month. The due date has come — “Edit” in the card on the confirmation screen; not yet — “Enter” in the list. Correct the amount in the form and tap “Save”: the transaction is recorded with the new amount, and the scheduled payment keeps the old one.
What you can do with a row
There are no buttons in the row. You swipe the row sideways with your finger — to a button that appears from underneath.
| Do this | What happens |
|---|---|
| Tap the row | The “Scheduled payment” form: change the amount, date, frequency — anything. “Save”. |
| Swipe left | “Enter” — enter the nearest due date right now: you paid rent in advance, money came early. A new transaction form opens with the payment's fields and today's date. Once saved, the transaction is recorded, this due date is closed, and the next one follows the schedule. |
| Swipe right | “Delete” — after the question “Delete the scheduled payment?”. Transactions already recorded from this payment stay. |
Reminders
The app reminds you of a due date with a notification: “Today: …”, “Tomorrow: …” or “In 3 days: …”. When to remind you — on the day of the payment, a day, 2 or 3 days ahead, or a week ahead — at what time, and whether to hide amounts on the lock screen is in “Settings” → “Reminders”.
Where else scheduled payments show up
“Overview” — the “What’s ahead” block: upcoming payments with dates, and the “Calendar” in “Scheduled” mode: upcoming due dates, entered ones and ones not entered. More in the article “Overview”.
Account screen — above the feed, a “What’s ahead” card: this account's scheduled payments. Tapping a row opens “Scheduled payments”.
“Goals” — if a category has a scheduled payment, the goal card suggests “From the scheduled payment: …”. More in the article “Goals”.
Weekly summary — if it's on, it includes upcoming scheduled payments. More in “Settings” → “Reminders”.